Views, Filters, Sorts & Groups
One of Closot's biggest strengths is that the same database can look completely different depending on who's looking at it and what they need to see. A single product roadmap database might show a timeline to the product manager, a board to the engineering lead, and a filtered table to each individual contributor — all without touching the underlying data. That's what views, filters, sorts, and groups are for.
Types of Database Views
Closot offers six layouts, each designed for a different kind of work. A new database starts in List view, and you can add as many additional views as you need.
| View | Best For |
|---|---|
| List | A full overview of your data, with each item opening as its own page |
| Board | Tracking items through workflow stages, Kanban-style |
| Calendar | Seeing items plotted against a date property |
| Timeline | Visualizing project schedules and date ranges |
| Chart | Aggregated data as bar, line, or donut charts |
| Gallery | Image-forward card browsing |
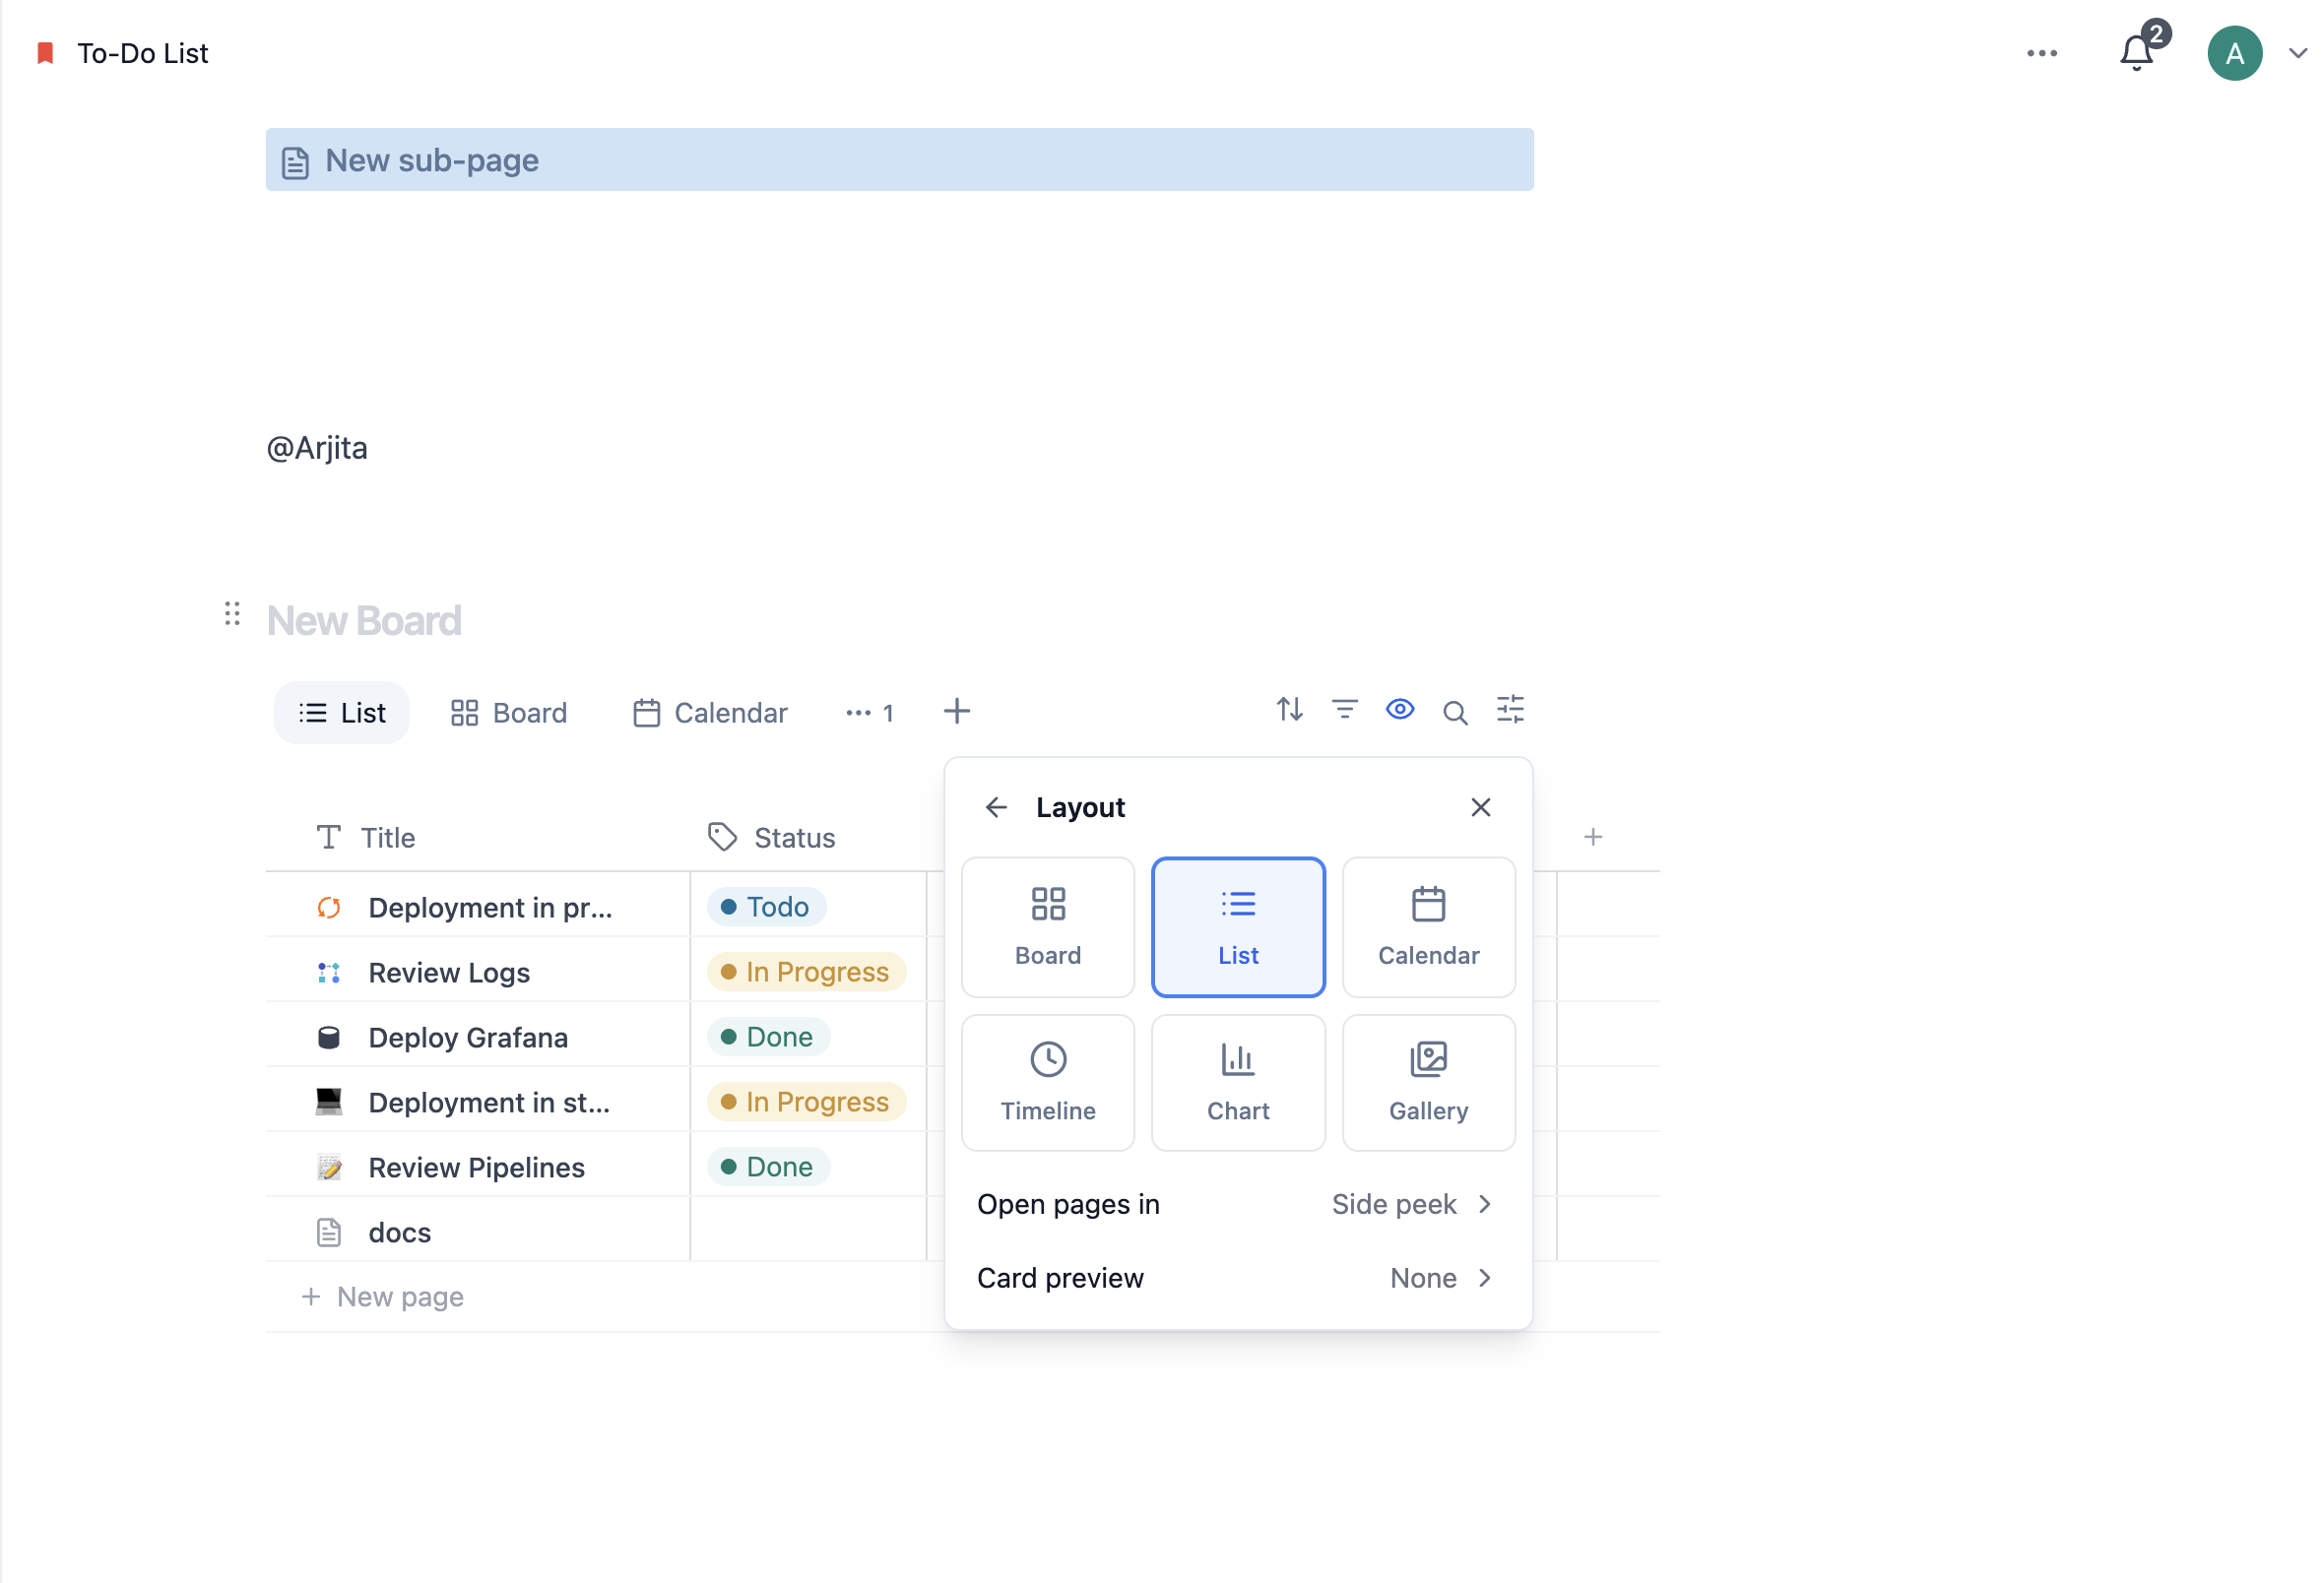
Forms and Dashboards work differently. Rather than being layouts you switch an existing database into, each is inserted as its own block from the / menu. See Forms and Dashboards View.
Creating and Managing Views
Add a New View
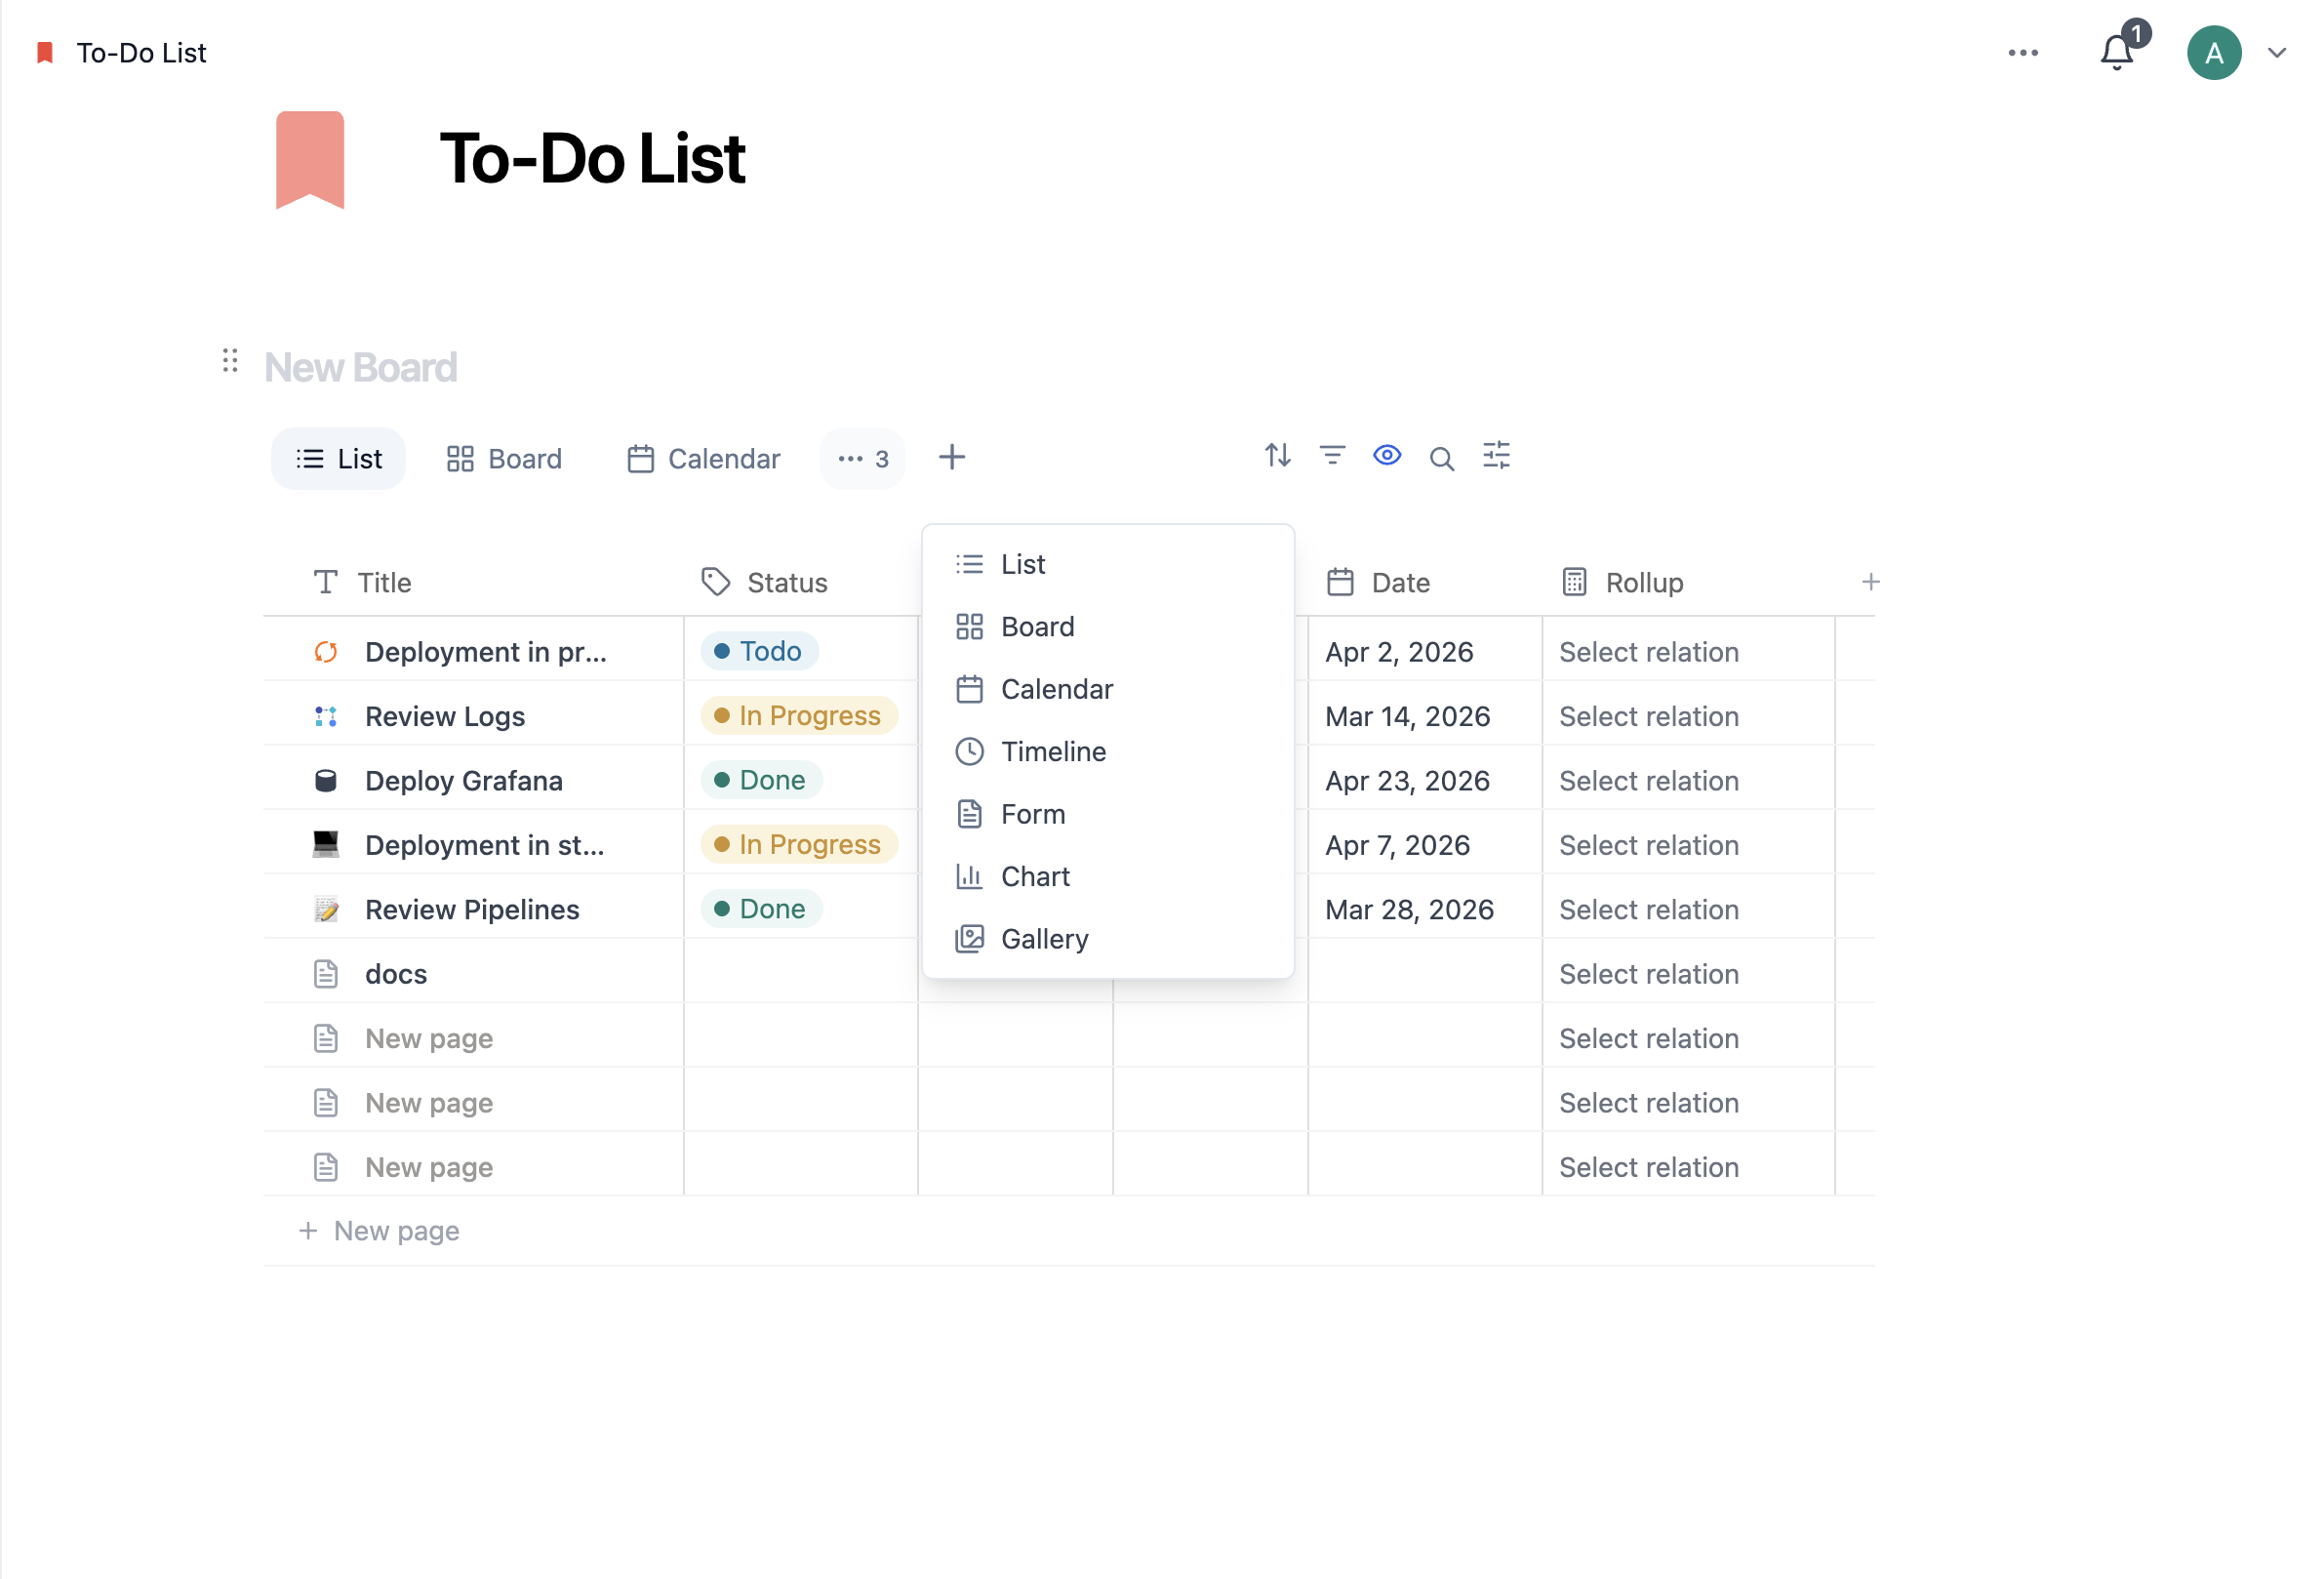
Click the + icon next to your current view name at the top of the database. A menu appears with all available view types — select one and it's instantly added.
Switch Between Views
All views for a database are displayed as tabs at the top of the database. Click any tab to switch. If you have many views, overflow views appear as "# more..." — click to expand the full list.
Reorder Views
Click and drag any view tab left or right to change its position in the tab bar.
Views in the Sidebar
When you open a database from the sidebar, its views appear as sub-items underneath the database, each marked with a • bullet indicator. Clicking any of these takes you directly to that view.
View-Level Independence
Each view maintains its own fully independent configuration. Filters you apply to the board view don't affect the list view. A sort you set up in the calendar doesn't carry over elsewhere. Every view is its own controlled lens on the same dataset.
View Settings
Every view has a settings panel accessible from the settings icon (sliding scales) at the top right of the database. From here you can configure:
- Layout — the visual format of the view
- Property visibility — which properties show on cards or rows
- Filter — rules that determine which items appear
- Sort — ordering logic for items
- Group — how items are clustered
- Copy link to view — share a direct URL that opens this specific view
How Pages Open
You can control how individual database pages open when clicked. Options:
- Side peek — slides open on the right side of the screen (the default)
- Center peek — opens as a focused modal in the center
- Full page — opens as a complete full-screen page
To change it: View settings → Layout → Open pages in.
Card Preview
Views that display items as cards can show an image at the top of each one. Set this under View settings → Layout → Card preview. Choose None for a text-only card, or point it at a property containing images.
Filters
Filters let you narrow down which items appear in a view without touching the underlying data. Every other view continues to show all items — filters only affect the view they're applied to.
Add a Filter
- Open the settings menu at the top right of the database
- Under View settings, select Filter
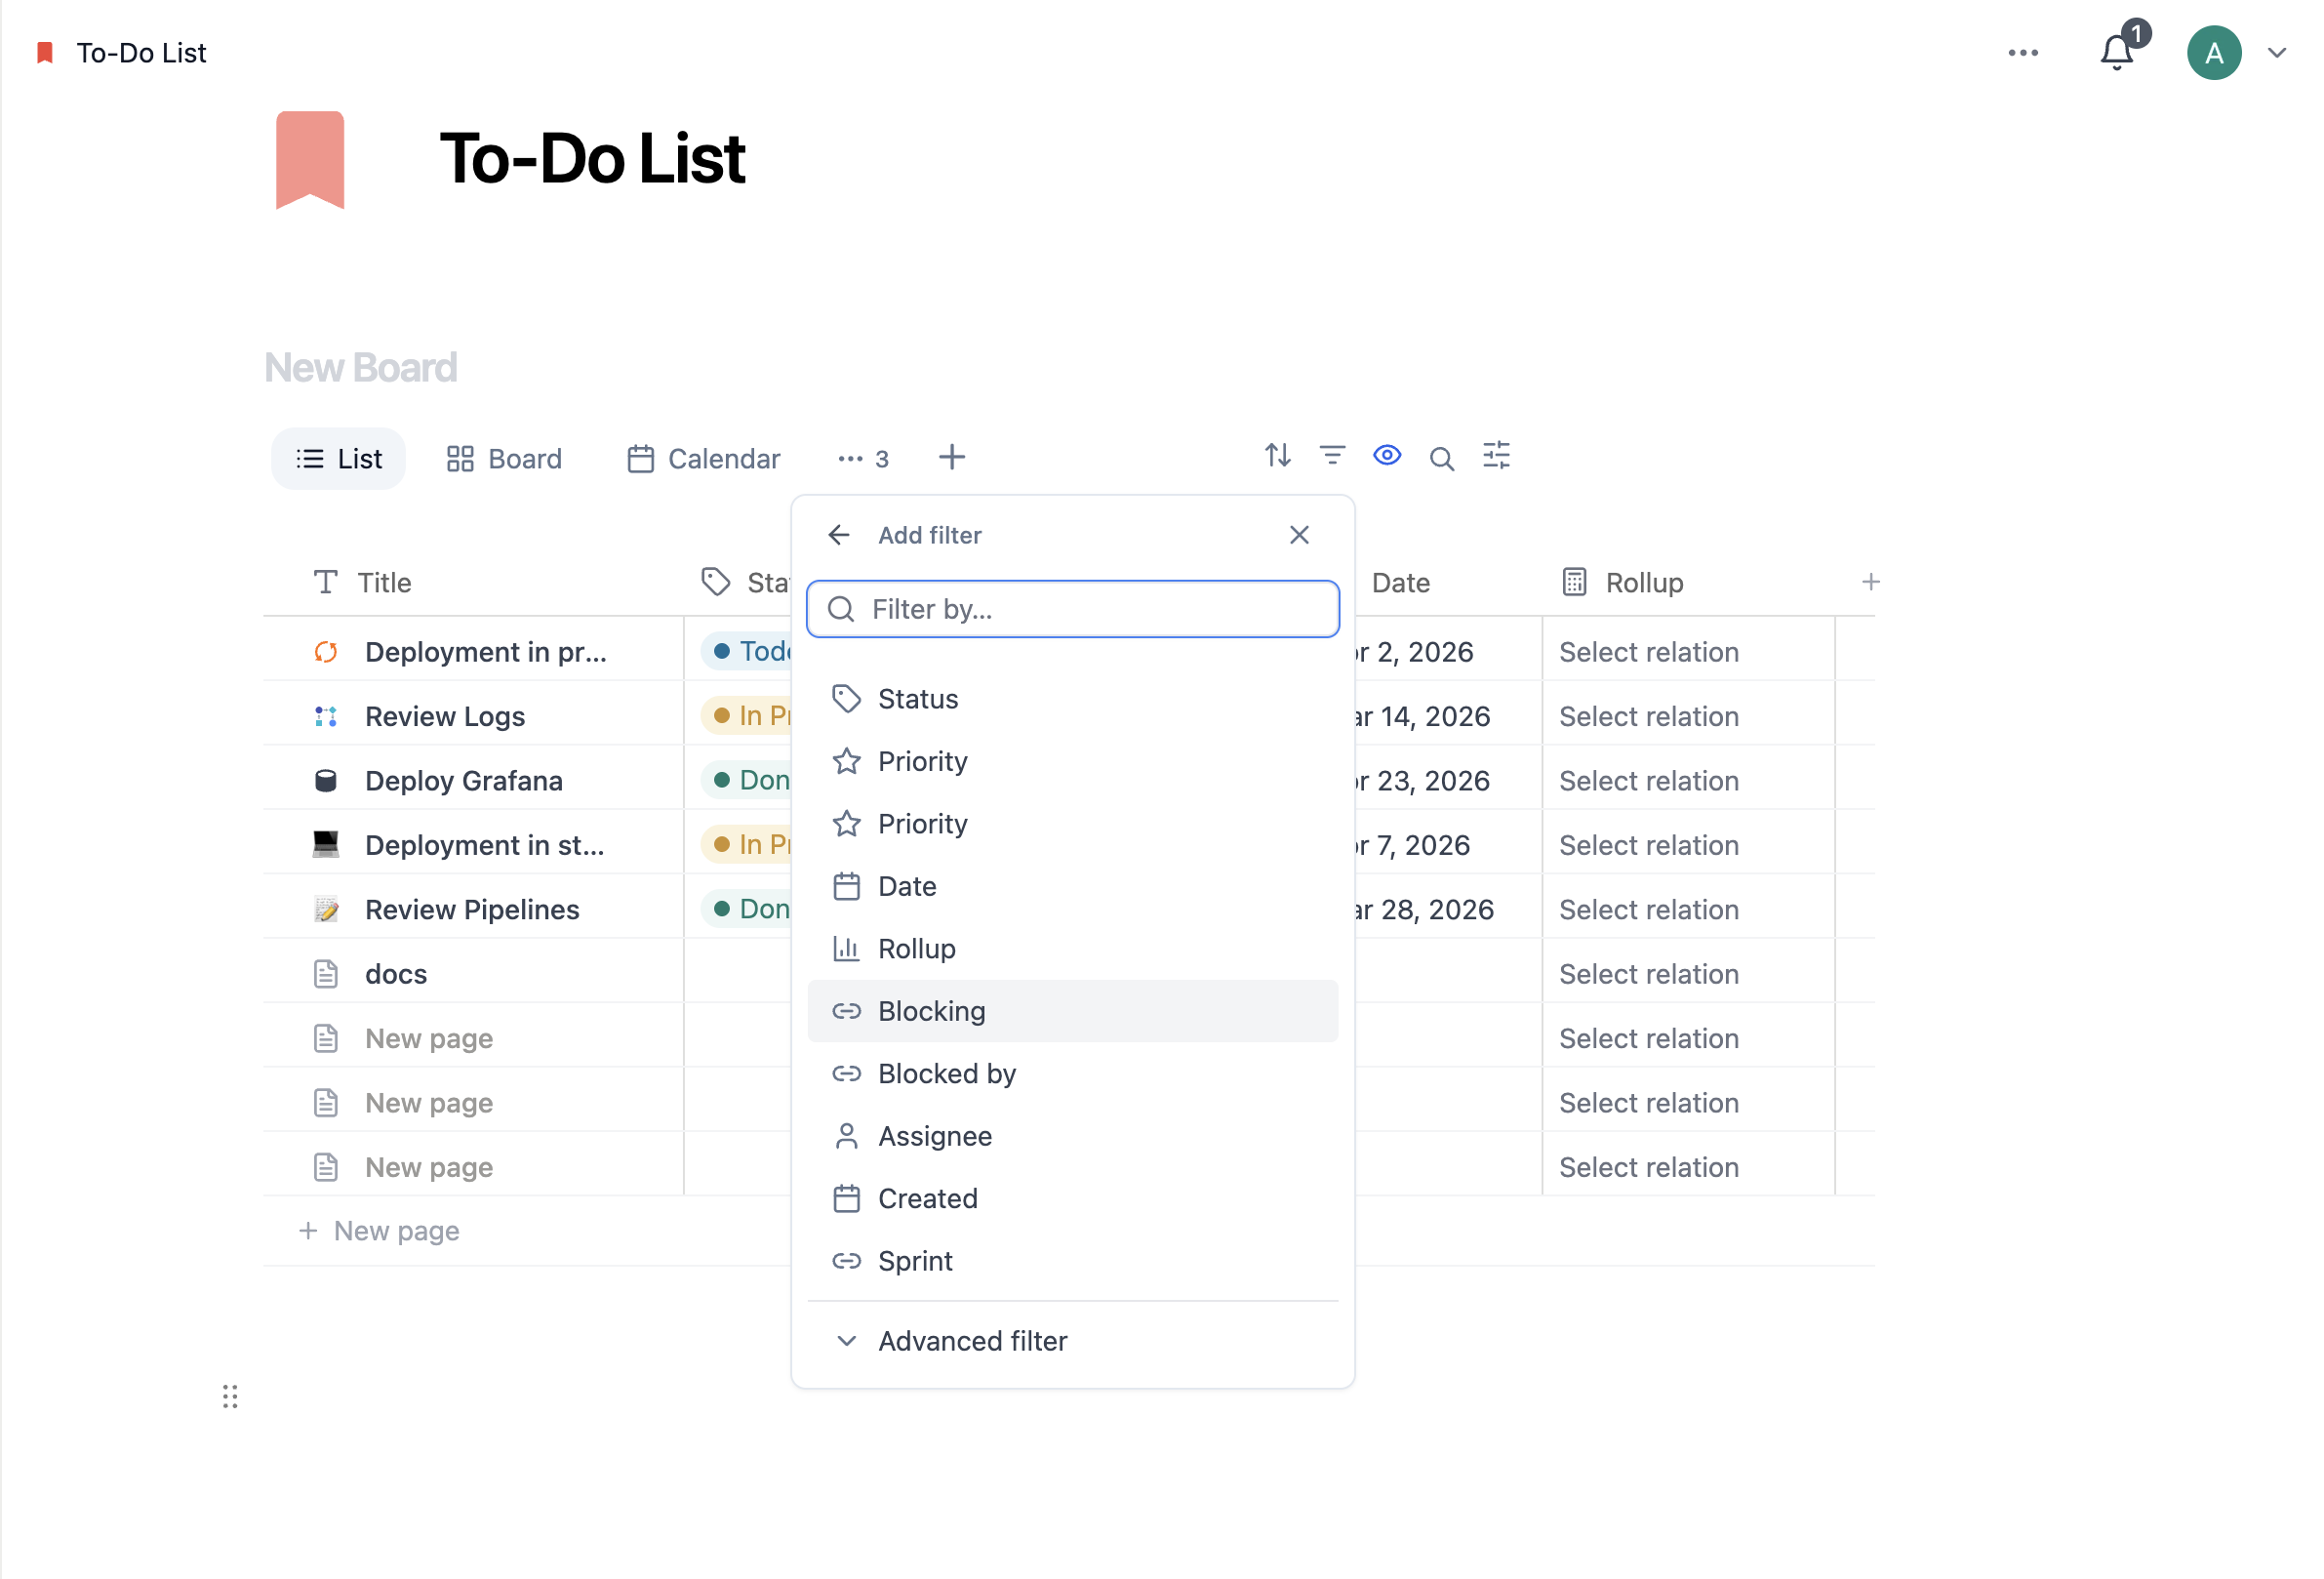
- Click Add a filter
- Choose the property to filter by
- Set the condition (e.g., "Status is In Progress", "Due date is before today")
- Optionally click Save for everyone to make the filter apply for all collaborators viewing this database — otherwise it's personal
Advanced Filters
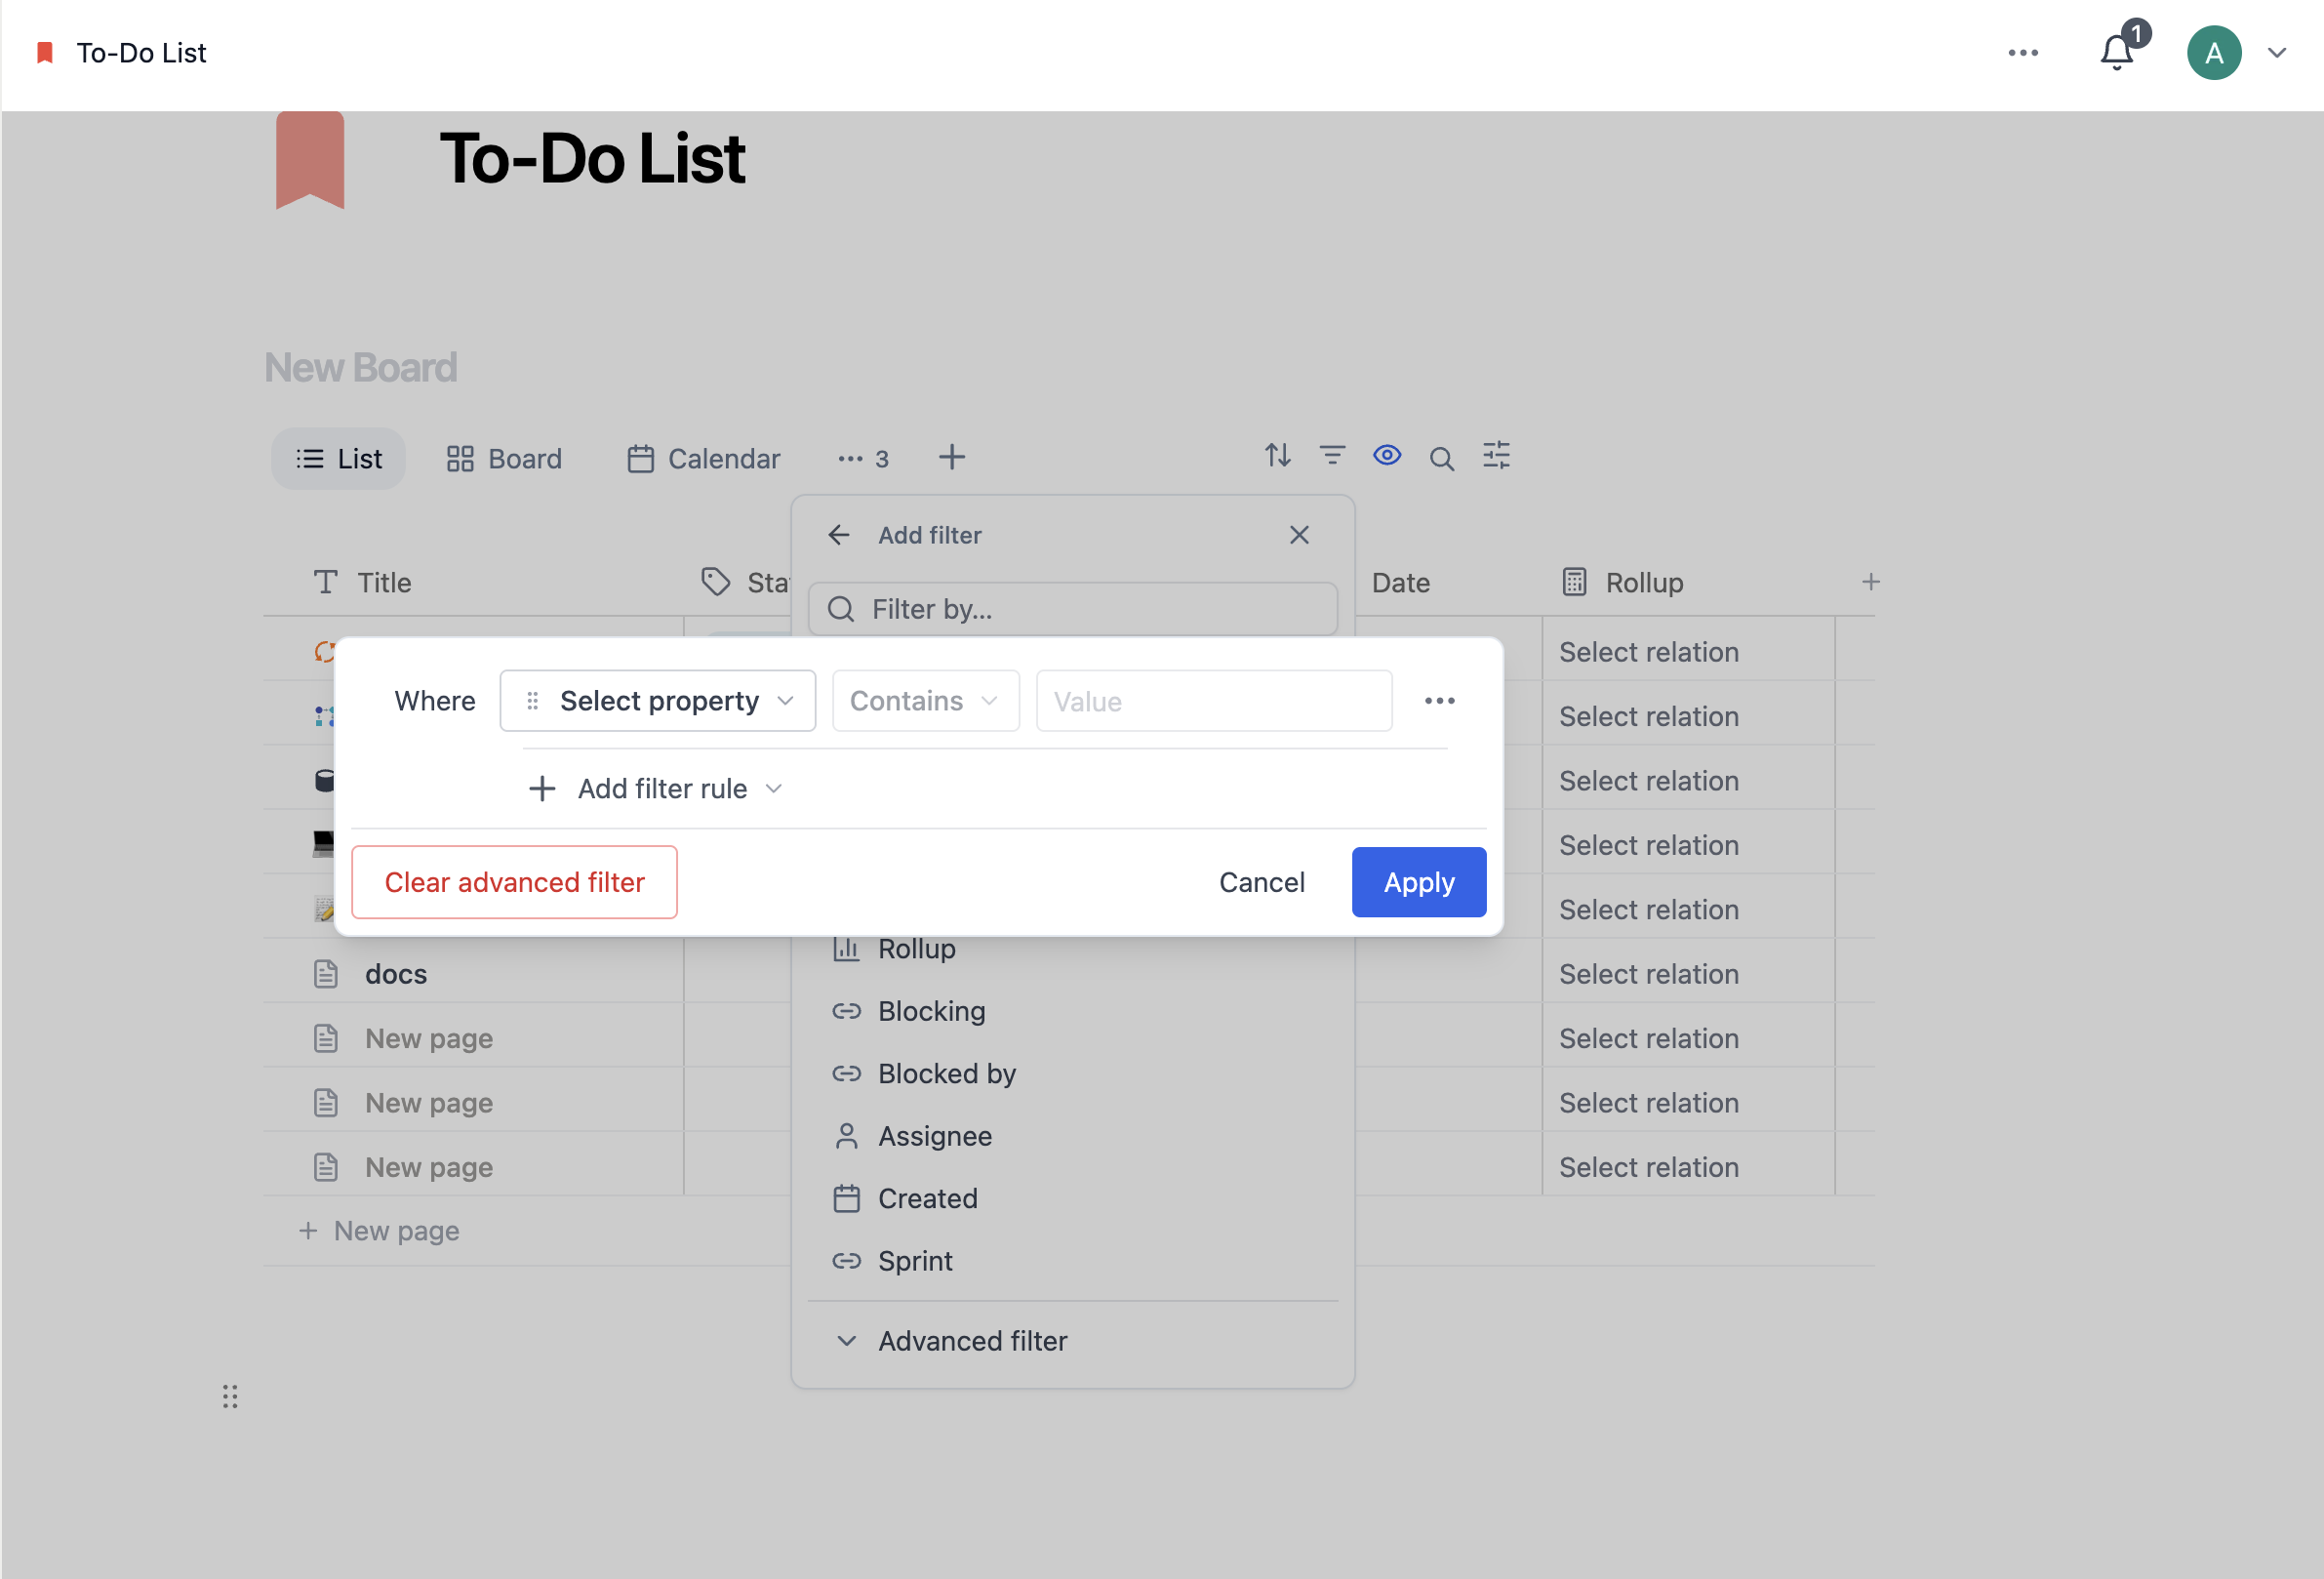
Need more control? Use advanced filters to combine multiple conditions with AND and OR logic, nested up to three layers deep.
- Click Add advanced filter
- Choose properties and configure their conditions
- Use AND to require all conditions, or OR to show items matching any
- Group conditions into nested logic blocks for complex rule sets
To convert a simple filter into an advanced one: click ••• next to the filter → Add to advanced filter.
Delete a Filter
- Open settings → Filter
- Click
•••next to the filter you want to remove - Select Delete filter
Sub-item visibility settings can affect what appears when filters are active. If a filter matches a parent item but not its sub-items (or vice versa), the display behavior depends on your sub-item display settings.
Sorts
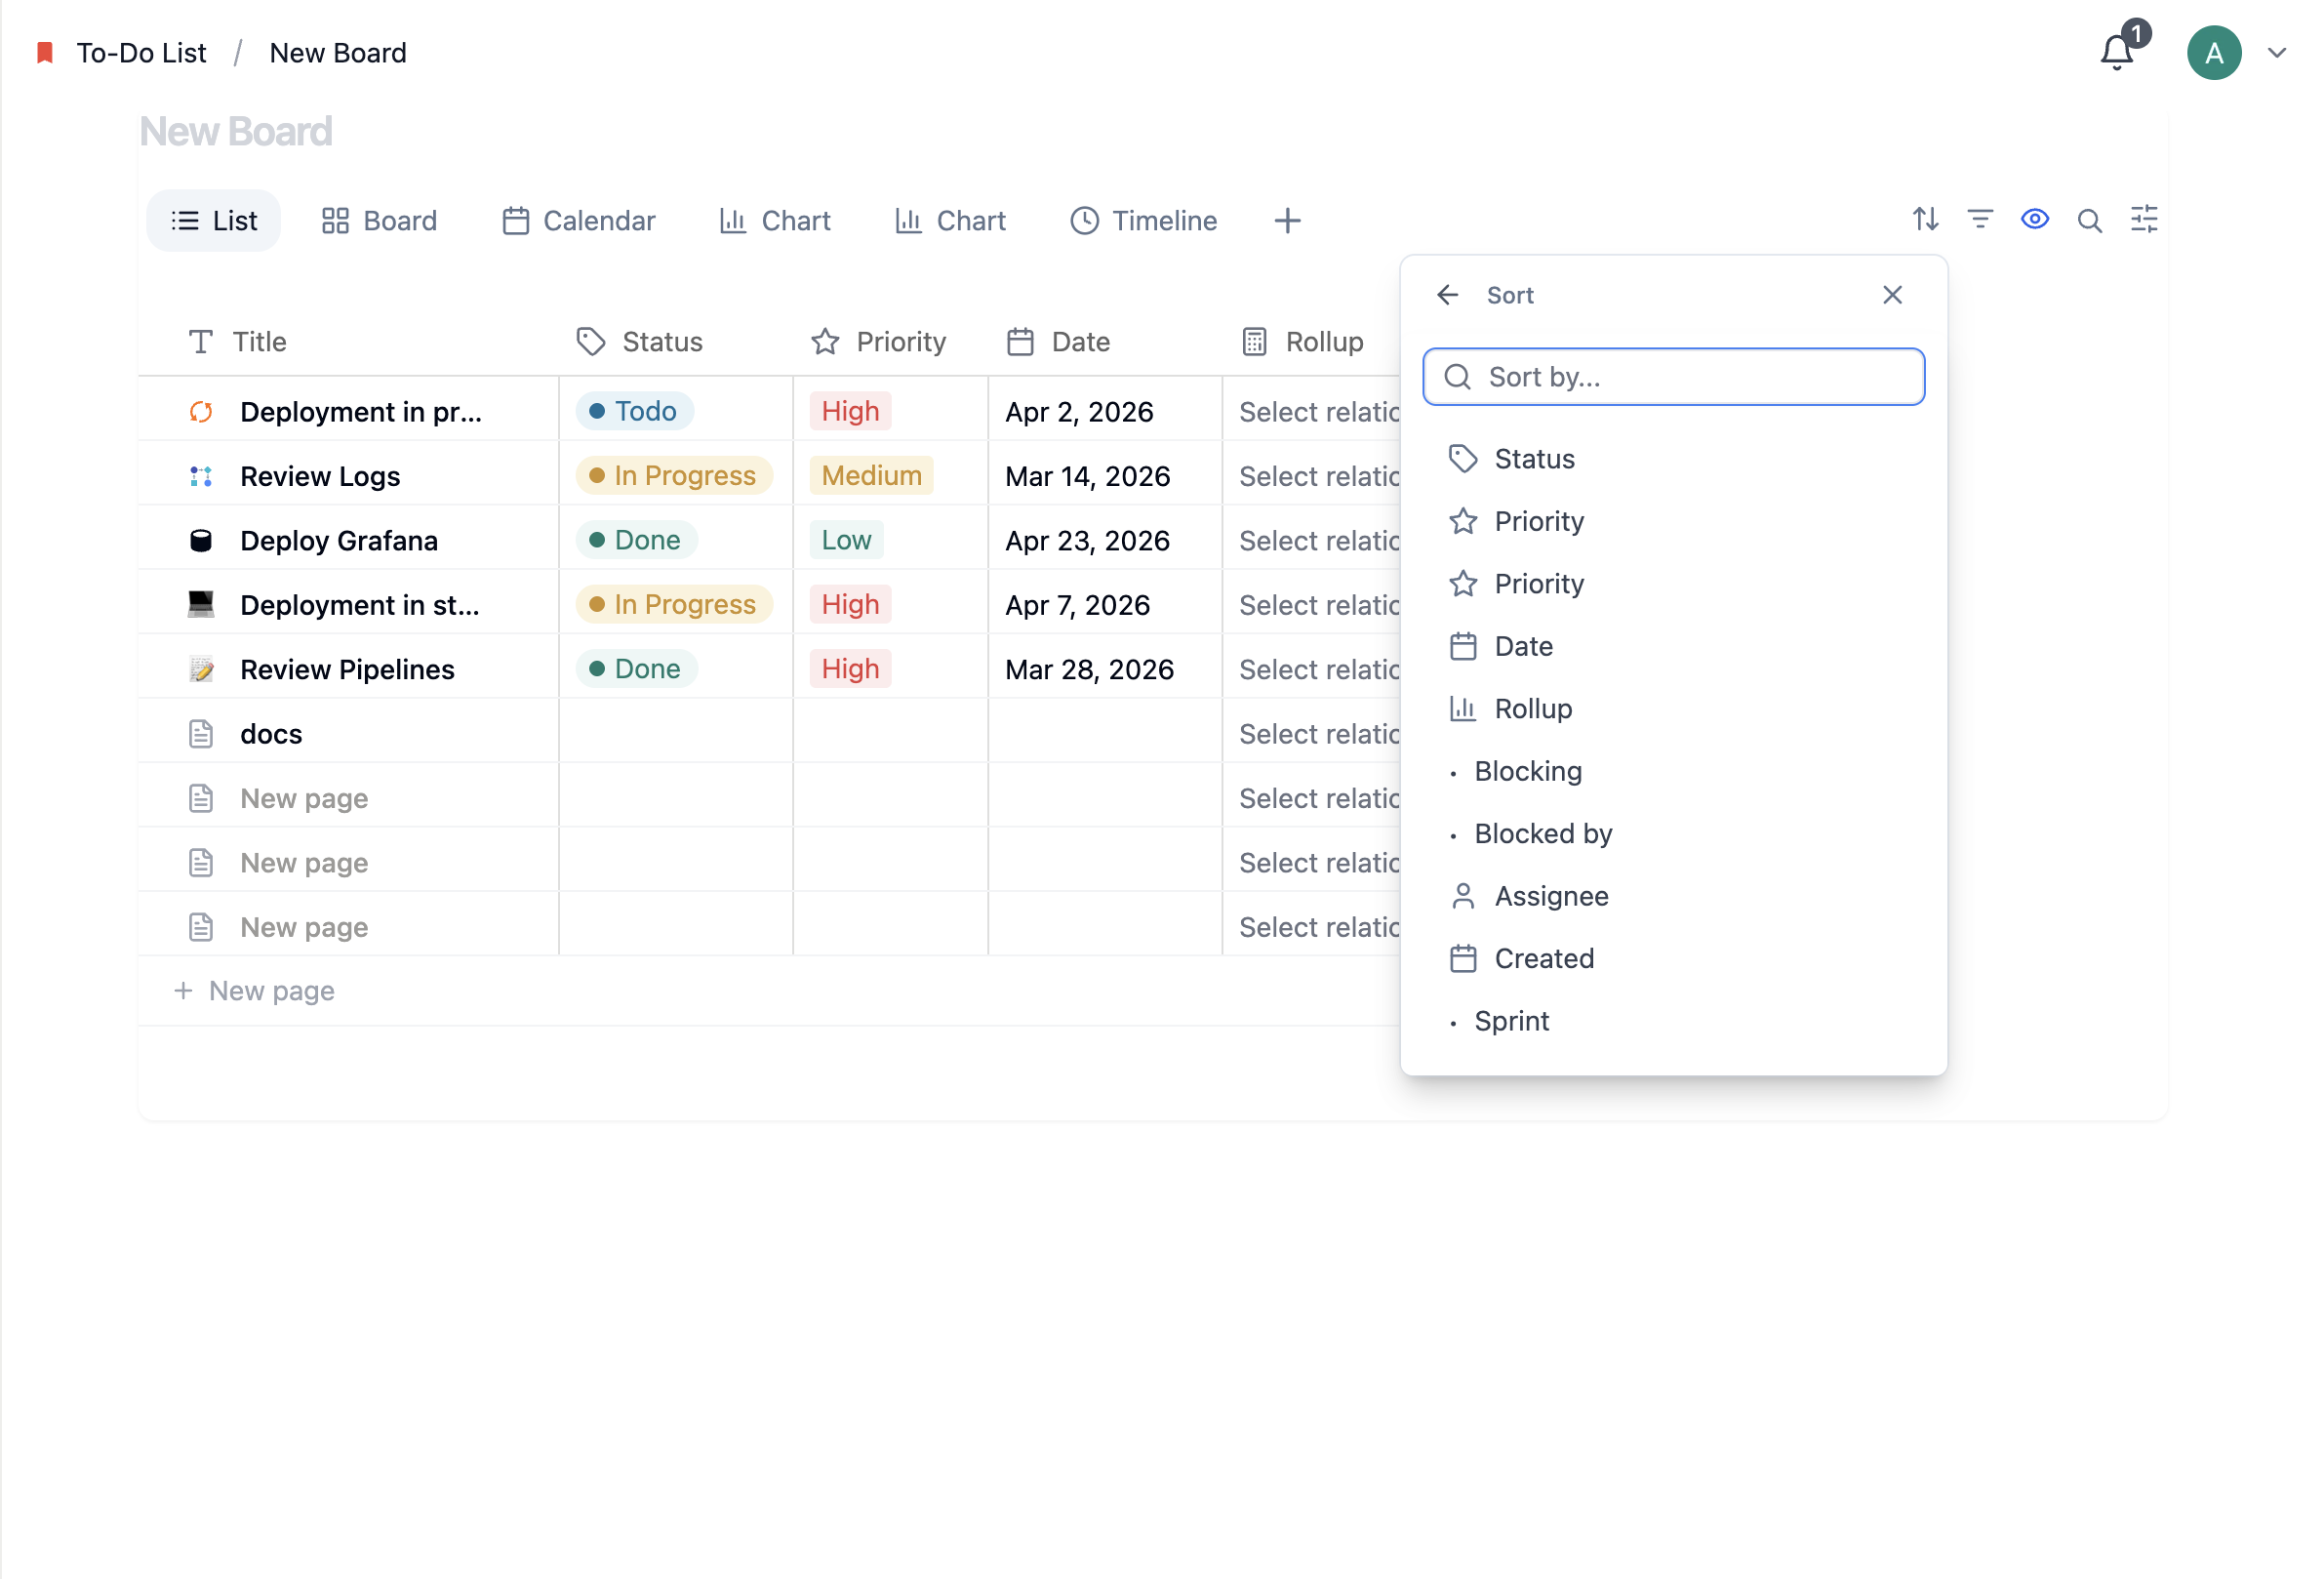
Sorting controls the order in which items appear within a view. You can sort by any property, in ascending or descending order.
Add a Sort
- Open the settings menu
- Under View settings, select Sort
- Click Add a sort
- Choose the property to sort by
- Select Ascending or Descending order
- Optionally click Save for everyone
Multiple Sorts
You can stack multiple sorts. Closot applies them in order — the first sort takes precedence, the second sort breaks ties, and so on. Reorder them by dragging the ⋮⋮ handle next to each sort rule.
Sort Logic by Property Type
| Property Type | Sort Behavior |
|---|---|
| Text | Alphabetical (A → Z or Z → A) |
| Number | Numerical (low → high or high → low) |
| Select / Multi-select | Custom order — drag options up or down in the property settings to define priority |
| Date | Chronological (oldest → newest or newest → oldest) |
Remove a Sort
Open settings → Sort → click the X next to the sort rule you want to remove.
Groups
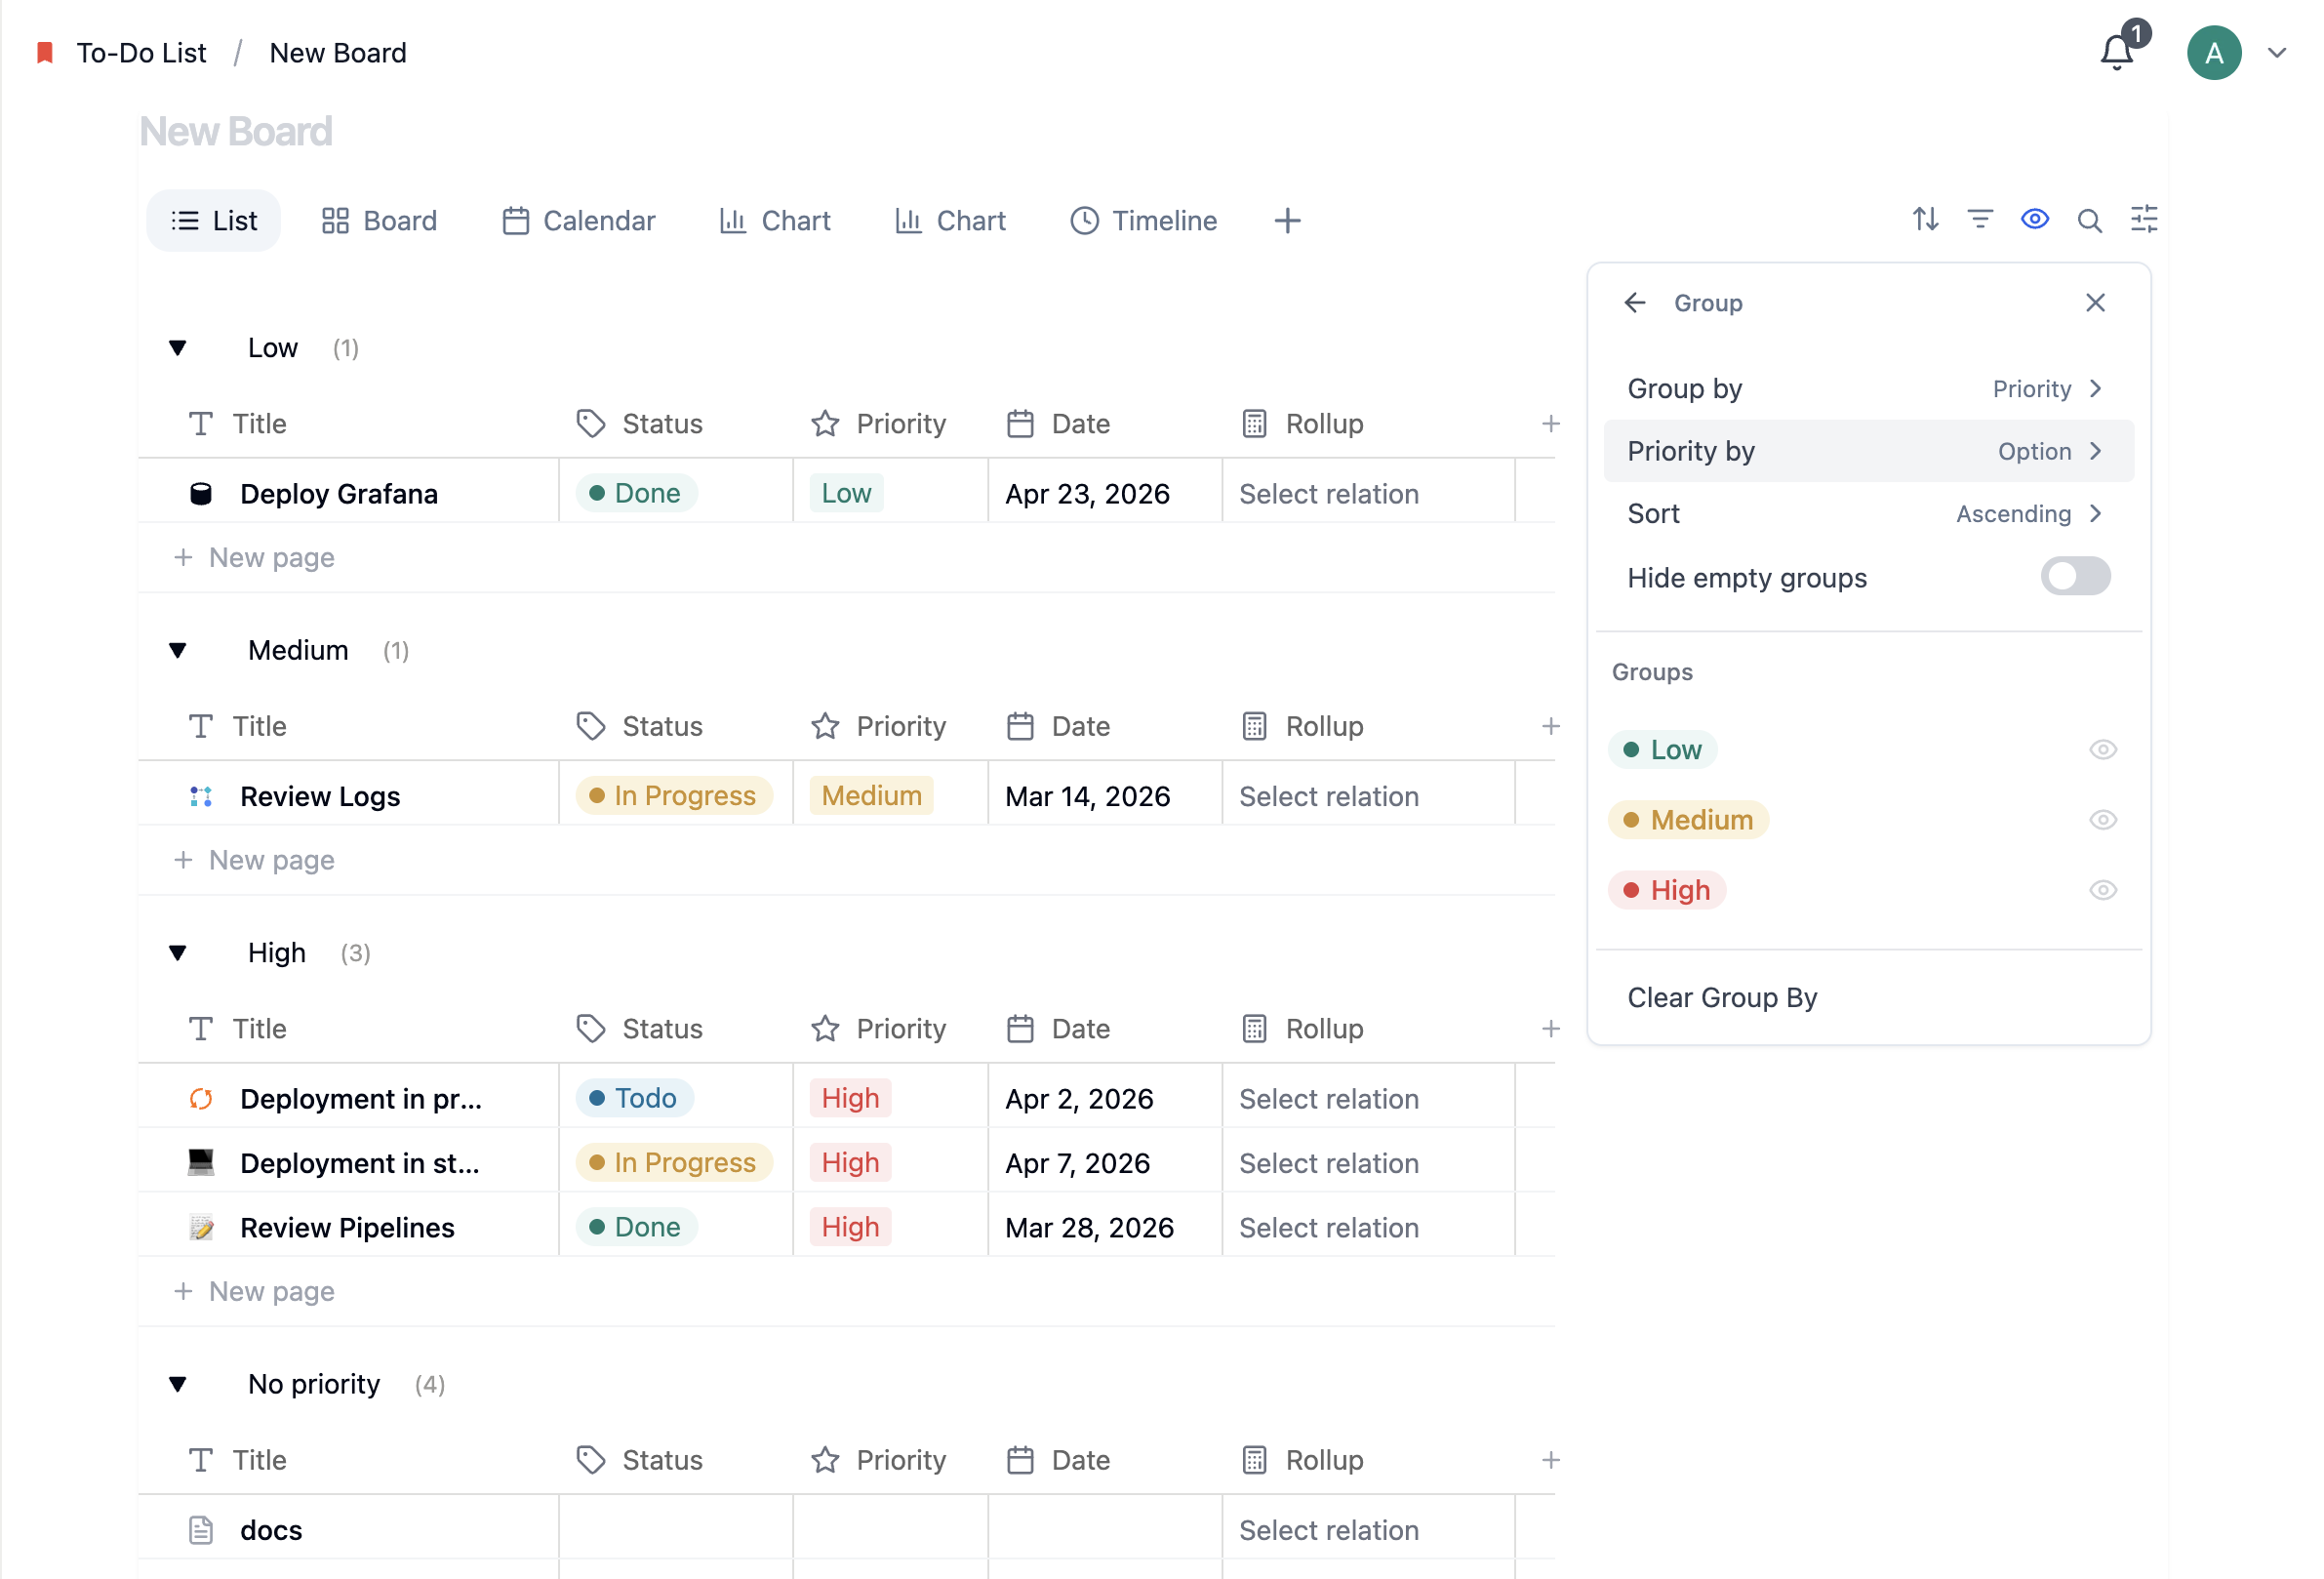
Groups organize your database items by a shared property value — clustering them into collapsible sections within the view. Grouping a task tracker by "Assigned Team" instantly shows you which work belongs to Engineering, Design, Marketing, and so on.
Create a Group
- Open settings → Group under View settings
- Choose the property to group by
Manage Groups
Inside the Group settings panel you can:
- Toggle individual group visibility using the 👁️ icon — hide groups that aren't relevant right now
- Sort groups manually by dragging them, or use the provided sort options
- Toggle Hide empty groups to keep your view clean when some groups have no items
Sub-Groups
Sub-groups add a second layer of organization on top of your primary grouping. For example, group a freelance project tracker by Client at the top level, then sub-group by Deliverable Status within each client section.
- Open settings → Sub-group
- Choose the secondary property to group by
Remove Grouping
Open settings → Group → click Clear Group By.
Database Search
Any database with three or more pages becomes searchable. Click the 🔍 magnifying glass icon at the top of the database and type your query. Closot searches across page titles and property values — so searching "Q4 Budget" will surface any item that mentions it in its name or a text property.
Up next: Database properties — Add context to every item with dates, statuses, people, formulas, and more.